移动玩家
如果我们不能移动玩家,那就不能算是游戏,对吧?在本节中,我们将学习如何获取输入事件。
输入事件
让玩家移动的第一步是开始监听输入事件。如果我们快速查看 ggez 输入示例,可以看到我们可以使用 is_key_pressed 检查某个键是否被按下。
让我们从一个非常基本的输入系统实现开始,在这里我们只是检查某个键是否被按下并打印到控制台。
#![allow(unused)]
fn main() {
#[allow(dead_code)]
fn run_input_print(_world: &World, context: &mut Context) {
    if context.keyboard.is_key_pressed(KeyCode::Up) {
        println!("UP");
    }
    if context.keyboard.is_key_pressed(KeyCode::Down) {
        println!("DOWN");
    }
    if context.keyboard.is_key_pressed(KeyCode::Left) {
        println!("LEFT");
    }
    if context.keyboard.is_key_pressed(KeyCode::Right) {
        println!("RIGHT");
    }
}
}
然后,我们将这段代码添加到 Game 的 event::EventHandler 实现块中:
#![allow(unused)]
fn main() {
impl event::EventHandler<ggez::GameError> for Game {
    fn update(&mut self, context: &mut Context) -> GameResult {
        // Run input system
        {
            run_input(&self.world, context);
        }

        Ok(())
    }

    fn draw(&mut self, context: &mut Context) -> GameResult {
        // Render game entities
        {
            run_rendering(&self.world, context);
        }

        Ok(())
    }
}
}
如果我们运行它,应该会在控制台中看到打印的行。
LEFT
LEFT
RIGHT
UP
DOWN
LEFT
输入系统
现在让我们实现最终的输入系统。
我们已经有了一种方法来检查某个键是否被按下,现在我们需要实现移动玩家的逻辑。我们希望实现的逻辑是:
- 如果按下 UP 键,我们将玩家在 y 轴上向上移动一个位置
- 如果按下 DOWN 键,我们将玩家在 y 轴上向下移动一个位置
- 如果按下 LEFT 键,我们将玩家在 x 轴上向左移动一个位置
- 如果按下 RIGHT 键,我们将玩家在 x 轴上向右移动一个位置
#![allow(unused)]
fn main() {
#[allow(dead_code)]
fn input_system_duplicate(world: &World, context: &mut Context) {
    for (_, (position, _player)) in world.query::<(&mut Position, &Player)>().iter() {
        if context.keyboard.is_key_pressed(KeyCode::Up) {
            position.y -= 1;
        }
        if context.keyboard.is_key_pressed(KeyCode::Down) {
            position.y += 1;
        }
        if context.keyboard.is_key_pressed(KeyCode::Left) {
            position.x -= 1;
        }
        if context.keyboard.is_key_pressed(KeyCode::Right) {
            position.x += 1;
        }
    }
}
}
输入系统非常简单,它获取所有玩家和位置(我们应该只有一个玩家,但这段代码不需要关心这一点,它理论上可以工作于我们希望用相同输入控制多个玩家的情况)。然后,对于每个玩家和位置组合,它将获取第一个按下的键并从输入队列中移除它。接着,它会计算所需的变换——例如,如果按下上键,我们希望向上移动一个格子,依此类推,并应用这个位置更新。
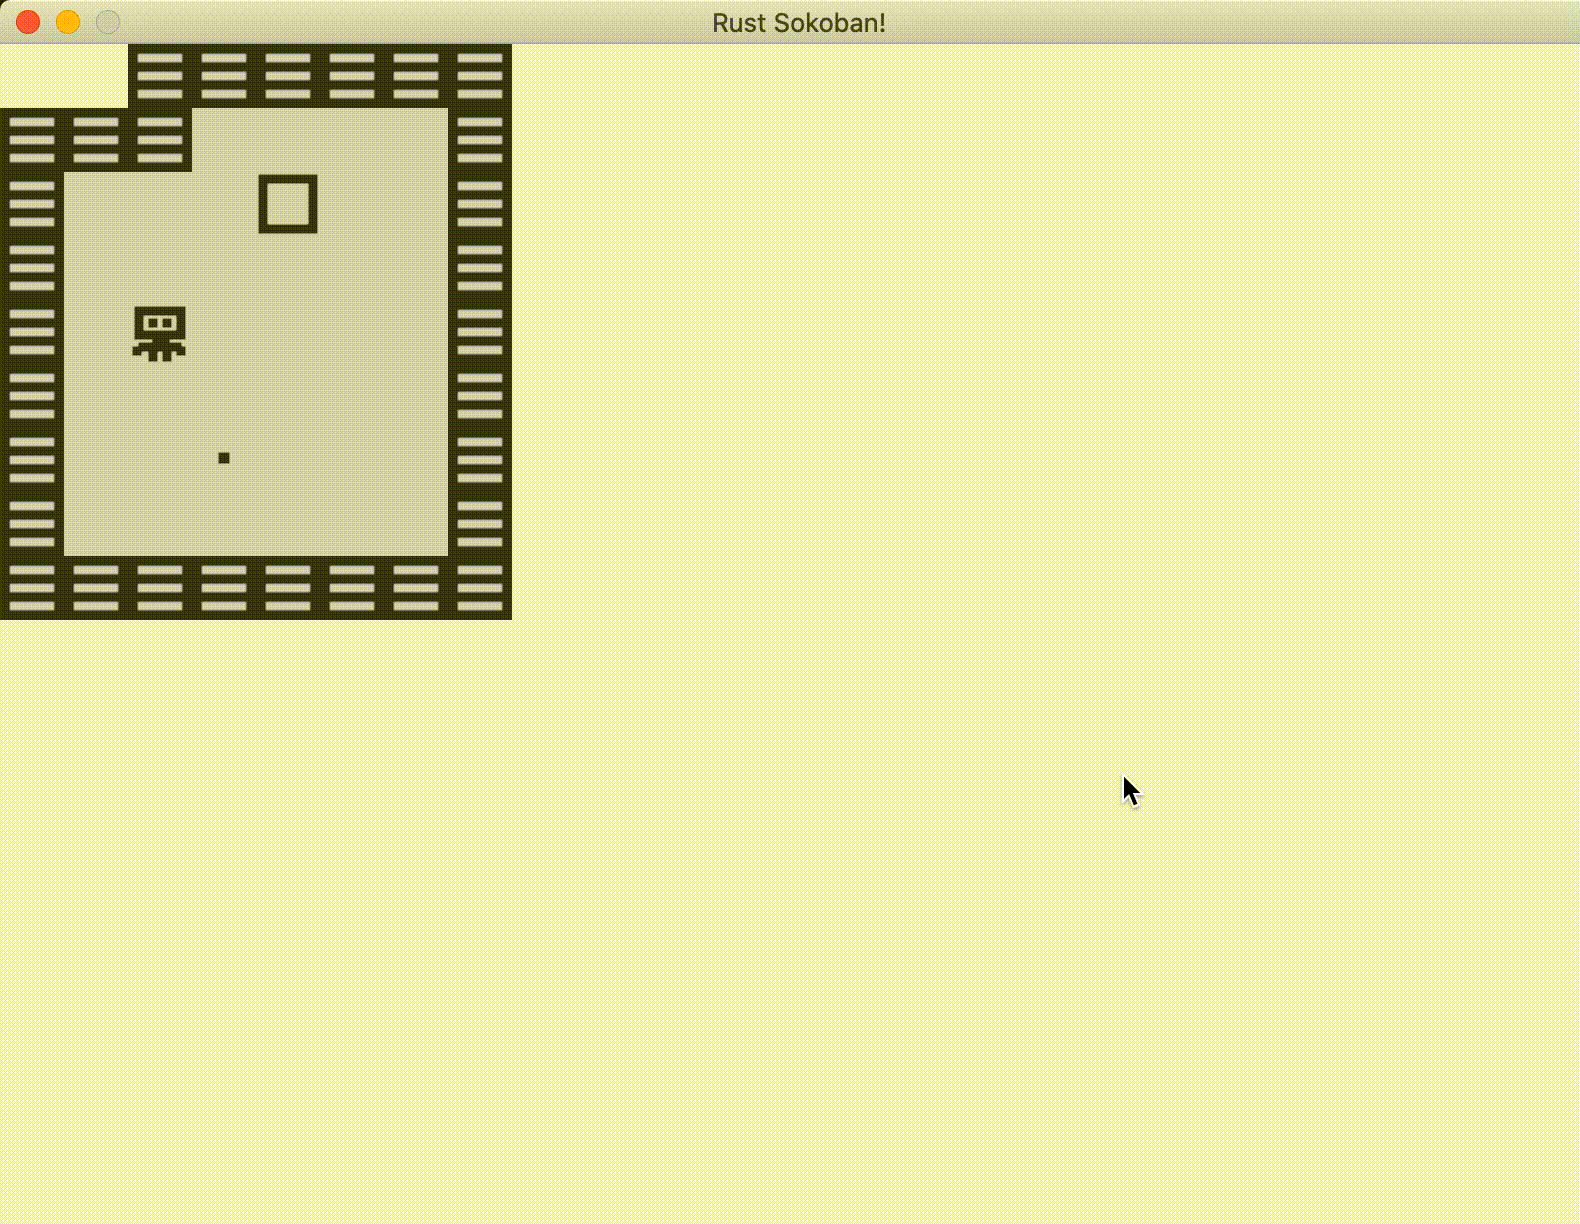
非常酷!这就是它的效果。注意我们可以穿过墙和箱子。在下一节中,当我们添加可移动组件时,我们会修复这个问题。
但你可能注意到一个问题,单次按键会触发多次移动。让我们在下一节中修复这个问题。
处理多次按键
问题在于我们在一秒内多次调用输入系统,这意味着按住一个键一秒钟会触发多次移动。作为玩家,这不是一个很好的体验,因为你无法很好地控制移动,很容易陷入一种情况——箱子卡在墙边,无法拉回。
我们有哪些选项来解决这个问题?我们可以记住上一个帧是否按下了键,如果是,我们跳过它。这需要存储上一帧的状态,并在当前帧中与之比较以决定是否移动,这完全可行。幸运的是,ggez 在他们的键盘 API 中添加了这个功能,你可以调用 is_key_just_pressed,它会自动检查当前状态。让我们试试,它看起来像这样:
#![allow(unused)]
fn main() {
fn run_input(world: &World, context: &mut Context) {
    for (_, (position, _player)) in world.query::<(&mut Position, &Player)>().iter() {
        if context.keyboard.is_key_just_pressed(KeyCode::Up) {
            position.y -= 1;
        }
        if context.keyboard.is_key_just_pressed(KeyCode::Down) {
            position.y += 1;
        }
        if context.keyboard.is_key_just_pressed(KeyCode::Left) {
            position.x -= 1;
        }
        if context.keyboard.is_key_just_pressed(KeyCode::Right) {
            position.x += 1;
        }
    }
}
}
现在一切都按预期工作了!
CODELINK: 你可以在 这里 查看本示例的完整代码。